
Equipment is the most consistent damage and survivability source in Blade Rising, and because every upgrade level costs resources, the order you level gear in decides how fast you climb the Floors of Evil. This tier list ranks the five equipment pieces and all fifteen upgrade tracks by real progression value, using the game's live equipment configuration: 100 upgrade levels per track, gated unlocks between pieces, and equipment tiers that advance at 25, 75, 150 and 240 mastery.
What you'll learn
- Which equipment piece to upgrade first in Blade Rising
- How all 15 upgrade tracks rank from S-tier to C-tier
- The exact unlock requirements between Sword, Helmet, Chest, Leggings and Boots
- How equipment tiers 2–5 unlock at 25, 75, 150 and 240 mastery
- How upgrade costs scale across 100 levels and when to stop investing
- Recommended upgrade orders for early, mid and late runs
Section 01
How Equipment Works in Blade Rising
Blade Rising has five equipment pieces: Sword, Helmet, Chest, Leggings and Boots.
Each piece carries three upgrade tracks — a Foundation stat, a Mechanic stat and a Mastery stat — for fifteen tracks in total.
Foundation stats give reliable, always-on value. Mechanic stats add a chance for something to happen. Mastery stats increase how large that something is when it happens.
Every track can be levelled up to level 100, and each level is paid for with the resource branch that track belongs to.
Section 02
Equipment Unlock Order
You do not choose your first piece — the game gates them in a fixed chain.
Sword is available from the start. Helmet unlocks once any Sword track reaches level 1. Chest unlocks once a Helmet track reaches level 5. Leggings unlock once a Chest track reaches level 5. Boots unlock once a Leggings track reaches level 5.
Within a piece, a track also needs the previous level range established before deeper levels open, so spreading a handful of levels across a piece is cheaper than pushing one track alone.
The practical takeaway: rush the cheap unlock levels on every piece first, then come back and deepen the tracks that matter.
Section 03
The Equipment Tier List
S-Tier — Sword: Damage, Helmet: Attack Speed, Helmet: Combat Mastery. These three decide how fast enemies die, and enemy kill speed is what gates every other system in the game.
A-Tier — Sword: Critical Chance, Sword: Critical Damage, Chest: Damage Reduction, Leggings: Health Regen. The crit pair together is the largest damage multiplier available on gear, while Damage Reduction and Health Regen are the two survivability stats that scale into boss fights.
B-Tier — Boots: Evasion, Boots: Opportunity Chance, Boots: Opportunity Damage, Leggings: Vamp Chance, Leggings: Vamp Healing, Helmet: Boon Power. Strong once your damage core is online, and excellent for long uninterrupted runs, but weak as an opening investment.
C-Tier — Chest: Reflect Chance, Chest: Reflected Damage. Reflect scales off damage you take, which means it pays out most when you are already losing the fight. Level it only after your core is finished.
Section 04
Interactive Equipment Comparison Tool
Use the tool below to sort all fifteen upgrade tracks by tier, piece, early-run value, late-run value, offense or defense.
Filter by equipment piece or by stat role, then tick up to three tracks to compare their unlock requirements and value profiles side by side.
Equipment Comparison Tool
Sort every upgrade track, filter by piece or role, and compare up to three side by side.
| Role | Early value (1-10)How much this track helps in your first runs, before prestige multipliers and mastery tiers come online. | Late value (1-10)How much this track is worth deep into progression, once mastery tiers (25/75/150/240) and prestige scaling are active. | Offense (1-10)Contribution to killing speed — flat damage, multipliers, crits and extra-hit triggers. | Defense (1-10)Contribution to staying alive on unattended runs — mitigation, evasion, regen and lifesteal. | |||
|---|---|---|---|---|---|---|---|
| S | Damage Sword | Foundation | Damage — Early value: 10/10 (100%)How much this track helps in your first runs, before prestige multipliers and mastery tiers come online. | Damage — Late value: 8/10 (80%)How much this track is worth deep into progression, once mastery tiers (25/75/150/240) and prestige scaling are active. | Damage — Offense: 10/10 (100%)Contribution to killing speed — flat damage, multipliers, crits and extra-hit triggers. | Damage — Defense: 0/10 (0%)Contribution to staying alive on unattended runs — mitigation, evasion, regen and lifesteal. | |
| S | Attack Speed Helmet | Foundation | Attack Speed — Early value: 9/10 (90%)How much this track helps in your first runs, before prestige multipliers and mastery tiers come online. | Attack Speed — Late value: 9/10 (90%)How much this track is worth deep into progression, once mastery tiers (25/75/150/240) and prestige scaling are active. | Attack Speed — Offense: 10/10 (100%)Contribution to killing speed — flat damage, multipliers, crits and extra-hit triggers. | Attack Speed — Defense: 0/10 (0%)Contribution to staying alive on unattended runs — mitigation, evasion, regen and lifesteal. | |
| S | Combat Mastery Helmet | Mastery | Combat Mastery — Early value: 5/10 (50%)How much this track helps in your first runs, before prestige multipliers and mastery tiers come online. | Combat Mastery — Late value: 10/10 (100%)How much this track is worth deep into progression, once mastery tiers (25/75/150/240) and prestige scaling are active. | Combat Mastery — Offense: 10/10 (100%)Contribution to killing speed — flat damage, multipliers, crits and extra-hit triggers. | Combat Mastery — Defense: 0/10 (0%)Contribution to staying alive on unattended runs — mitigation, evasion, regen and lifesteal. | |
| A | Critical Chance Sword | Mechanic | Critical Chance — Early value: 5/10 (50%)How much this track helps in your first runs, before prestige multipliers and mastery tiers come online. | Critical Chance — Late value: 8/10 (80%)How much this track is worth deep into progression, once mastery tiers (25/75/150/240) and prestige scaling are active. | Critical Chance — Offense: 8/10 (80%)Contribution to killing speed — flat damage, multipliers, crits and extra-hit triggers. | Critical Chance — Defense: 0/10 (0%)Contribution to staying alive on unattended runs — mitigation, evasion, regen and lifesteal. | |
| A | Critical Damage Sword | Mastery | Critical Damage — Early value: 4/10 (40%)How much this track helps in your first runs, before prestige multipliers and mastery tiers come online. | Critical Damage — Late value: 9/10 (90%)How much this track is worth deep into progression, once mastery tiers (25/75/150/240) and prestige scaling are active. | Critical Damage — Offense: 9/10 (90%)Contribution to killing speed — flat damage, multipliers, crits and extra-hit triggers. | Critical Damage — Defense: 0/10 (0%)Contribution to staying alive on unattended runs — mitigation, evasion, regen and lifesteal. | |
| A | Damage Reduction Chest | Foundation | Damage Reduction — Early value: 7/10 (70%)How much this track helps in your first runs, before prestige multipliers and mastery tiers come online. | Damage Reduction — Late value: 8/10 (80%)How much this track is worth deep into progression, once mastery tiers (25/75/150/240) and prestige scaling are active. | Damage Reduction — Offense: 0/10 (0%)Contribution to killing speed — flat damage, multipliers, crits and extra-hit triggers. | Damage Reduction — Defense: 10/10 (100%)Contribution to staying alive on unattended runs — mitigation, evasion, regen and lifesteal. | |
| A | Health Regen Leggings | Foundation | Health Regen — Early value: 7/10 (70%)How much this track helps in your first runs, before prestige multipliers and mastery tiers come online. | Health Regen — Late value: 7/10 (70%)How much this track is worth deep into progression, once mastery tiers (25/75/150/240) and prestige scaling are active. | Health Regen — Offense: 0/10 (0%)Contribution to killing speed — flat damage, multipliers, crits and extra-hit triggers. | Health Regen — Defense: 9/10 (90%)Contribution to staying alive on unattended runs — mitigation, evasion, regen and lifesteal. | |
| B | Boon Power Helmet | Mechanic | Boon Power — Early value: 3/10 (30%)How much this track helps in your first runs, before prestige multipliers and mastery tiers come online. | Boon Power — Late value: 6/10 (60%)How much this track is worth deep into progression, once mastery tiers (25/75/150/240) and prestige scaling are active. | Boon Power — Offense: 5/10 (50%)Contribution to killing speed — flat damage, multipliers, crits and extra-hit triggers. | Boon Power — Defense: 3/10 (30%)Contribution to staying alive on unattended runs — mitigation, evasion, regen and lifesteal. | |
| B | Vamp Chance Leggings | Mechanic | Vamp Chance — Early value: 3/10 (30%)How much this track helps in your first runs, before prestige multipliers and mastery tiers come online. | Vamp Chance — Late value: 7/10 (70%)How much this track is worth deep into progression, once mastery tiers (25/75/150/240) and prestige scaling are active. | Vamp Chance — Offense: 2/10 (20%)Contribution to killing speed — flat damage, multipliers, crits and extra-hit triggers. | Vamp Chance — Defense: 7/10 (70%)Contribution to staying alive on unattended runs — mitigation, evasion, regen and lifesteal. | |
| B | Vamp Healing Leggings | Mastery | Vamp Healing — Early value: 2/10 (20%)How much this track helps in your first runs, before prestige multipliers and mastery tiers come online. | Vamp Healing — Late value: 8/10 (80%)How much this track is worth deep into progression, once mastery tiers (25/75/150/240) and prestige scaling are active. | Vamp Healing — Offense: 2/10 (20%)Contribution to killing speed — flat damage, multipliers, crits and extra-hit triggers. | Vamp Healing — Defense: 8/10 (80%)Contribution to staying alive on unattended runs — mitigation, evasion, regen and lifesteal. | |
| B | Evasion Boots | Foundation | Evasion — Early value: 4/10 (40%)How much this track helps in your first runs, before prestige multipliers and mastery tiers come online. | Evasion — Late value: 7/10 (70%)How much this track is worth deep into progression, once mastery tiers (25/75/150/240) and prestige scaling are active. | Evasion — Offense: 0/10 (0%)Contribution to killing speed — flat damage, multipliers, crits and extra-hit triggers. | Evasion — Defense: 8/10 (80%)Contribution to staying alive on unattended runs — mitigation, evasion, regen and lifesteal. | |
| B | Opportunity Chance Boots | Mechanic | Opportunity Chance — Early value: 3/10 (30%)How much this track helps in your first runs, before prestige multipliers and mastery tiers come online. | Opportunity Chance — Late value: 7/10 (70%)How much this track is worth deep into progression, once mastery tiers (25/75/150/240) and prestige scaling are active. | Opportunity Chance — Offense: 7/10 (70%)Contribution to killing speed — flat damage, multipliers, crits and extra-hit triggers. | Opportunity Chance — Defense: 0/10 (0%)Contribution to staying alive on unattended runs — mitigation, evasion, regen and lifesteal. | |
| B | Opportunity Damage Boots | Mastery | Opportunity Damage — Early value: 2/10 (20%)How much this track helps in your first runs, before prestige multipliers and mastery tiers come online. | Opportunity Damage — Late value: 7/10 (70%)How much this track is worth deep into progression, once mastery tiers (25/75/150/240) and prestige scaling are active. | Opportunity Damage — Offense: 7/10 (70%)Contribution to killing speed — flat damage, multipliers, crits and extra-hit triggers. | Opportunity Damage — Defense: 0/10 (0%)Contribution to staying alive on unattended runs — mitigation, evasion, regen and lifesteal. | |
| C | Reflect Chance Chest | Mechanic | Reflect Chance — Early value: 2/10 (20%)How much this track helps in your first runs, before prestige multipliers and mastery tiers come online. | Reflect Chance — Late value: 4/10 (40%)How much this track is worth deep into progression, once mastery tiers (25/75/150/240) and prestige scaling are active. | Reflect Chance — Offense: 3/10 (30%)Contribution to killing speed — flat damage, multipliers, crits and extra-hit triggers. | Reflect Chance — Defense: 2/10 (20%)Contribution to staying alive on unattended runs — mitigation, evasion, regen and lifesteal. | |
| C | Reflected Damage Chest | Mastery | Reflected Damage — Early value: 1/10 (10%)How much this track helps in your first runs, before prestige multipliers and mastery tiers come online. | Reflected Damage — Late value: 4/10 (40%)How much this track is worth deep into progression, once mastery tiers (25/75/150/240) and prestige scaling are active. | Reflected Damage — Offense: 4/10 (40%)Contribution to killing speed — flat damage, multipliers, crits and extra-hit triggers. | Reflected Damage — Defense: 2/10 (20%)Contribution to staying alive on unattended runs — mitigation, evasion, regen and lifesteal. |
Tick up to three tracks to compare them side by side. Hover or tap any bar or ? icon for the exact score and what it means.
Section 05
Sword — Damage, Critical Chance, Critical Damage
Damage (Foundation) adds flat damage to every hit and is the single best first purchase in the game.
Critical Chance (Mechanic) is the chance for a hit to become a critical strike.
Critical Damage (Mastery) increases the multiplier used when a critical strike lands.
Level these as a set. Critical Chance without Critical Damage adds very little, and Critical Damage with almost no Critical Chance almost never triggers.
Section 06
Helmet — Attack Speed, Boon Power, Combat Mastery
Attack Speed (Foundation) reduces your attack interval, so you land more hits per second — it multiplies every other damage stat you own.
Boon Power (Mechanic) increases the strength of combat boons.
Combat Mastery (Mastery) is a global damage multiplier applied after flat damage bonuses, which makes it the strongest late-run damage track on gear.
Because Combat Mastery multiplies your Sword investment, it is worth more the more Sword Damage you already have.
Section 07
Chest — Damage Reduction, Reflect Chance, Reflected Damage
Damage Reduction (Foundation) cuts incoming damage before it hits your HP and is the most reliable defensive stat in the game.
Reflect Chance (Mechanic) is the chance to send part of incoming damage back to the enemy.
Reflected Damage (Mastery) sets how much is sent back when Reflect triggers.
Take Damage Reduction whenever a floor starts killing you. Treat the Reflect pair as a late-run luxury.
Section 08
Leggings — Health Regen, Vamp Chance, Vamp Healing
Health Regen (Foundation) restores a percentage of max HP on every regen trigger and is what lets a run continue unattended.
Vamp Chance (Mechanic) is the chance to heal after dealing damage.
Vamp Healing (Mastery) is the percentage of dealt damage restored when Vamp triggers.
Vamp scales with your damage, so it becomes far stronger after your Sword and Helmet cores are built. On a high-damage build the Vamp pair can outperform Health Regen entirely.
Section 09
Boots — Evasion, Opportunity Chance, Opportunity Damage
Evasion (Foundation) is a chance to fully avoid an incoming attack — it is the only stat that removes damage completely rather than reducing it.
Opportunity Chance (Mechanic) is the chance to trigger bonus damage on hit.
Opportunity Damage (Mastery) sets how much extra damage that trigger deals.
Boots unlock last and are best treated as a second pass once every other piece has its Foundation track levelled.
Section 10
Equipment Tiers and Mastery Thresholds
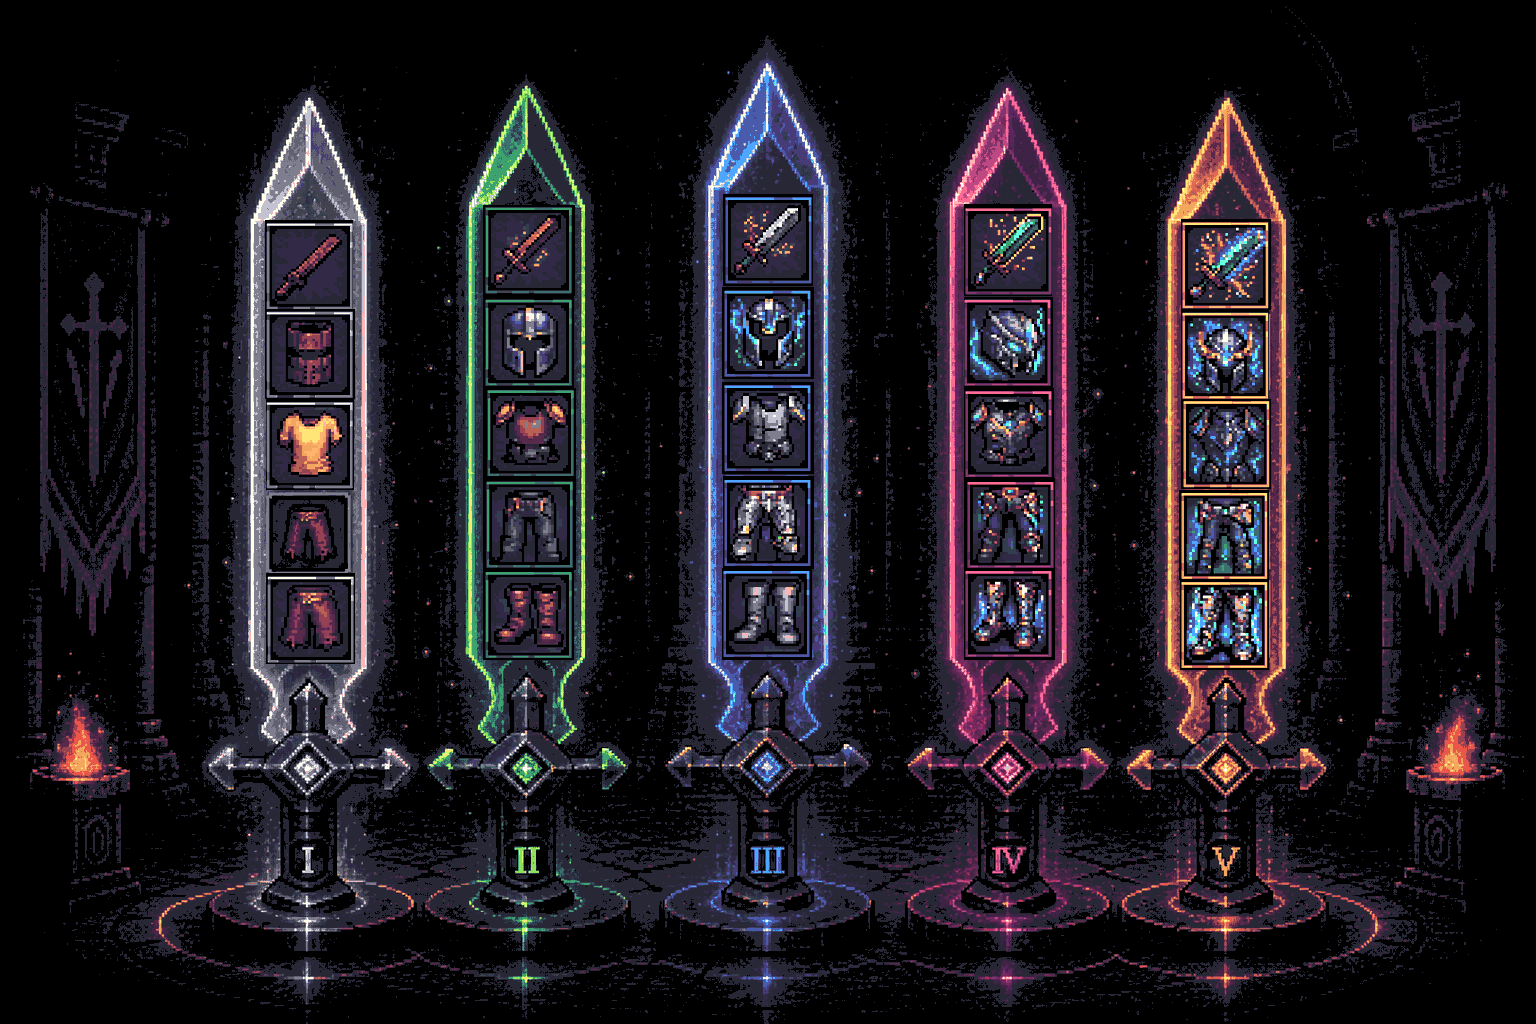
Equipment advances through five visual and functional tiers driven by accumulated mastery.
Tier 2 begins at 25 mastery, Tier 3 at 75, Tier 4 at 150 and Tier 5 at 240.
Because the thresholds count total mastery rather than mastery on one track, spreading levels across a piece reaches the next tier at the same pace as focusing a single track — but a spread build converts into more usable stats along the way.
Section 11
Upgrade Costs — Where the Curve Bites
Upgrade costs start at 10, 25, 60, 150 and 400 for the first five levels, cross 1,000 at level 6 and reach roughly 100,000 by level 20.
By level 30 a single level costs about 1 million, by level 40 about 10 million, by level 60 about 750 million, and level 100 costs 2 trillion.
In practice this means the first twenty levels of any track are almost free relative to their benefit, while levels past forty are a serious commitment that should only go into S-tier and A-tier tracks.
When a level costs more than roughly ten minutes of your current income, that resource is usually better spent on a lower-level track on another piece.
Section 12
Recommended Upgrade Order
Early run: buy the first five levels on Sword, then Helmet, then Chest, Leggings and Boots to satisfy every unlock rule.
Then take Sword Damage to around level 20, followed by Helmet Attack Speed to a similar level.
Add Chest Damage Reduction and Leggings Health Regen the first time a floor stalls you on survivability rather than damage.
Mid run: build the Sword crit pair together, then push Helmet Combat Mastery as your global multiplier.
Late run: fill in Boots Opportunity and Leggings Vamp as damage converters, and leave the Chest Reflect pair for last.
Section 13
Equipment, Prestige and Ascension
Equipment upgrades are funded by the resource branches you build through Gathering, so gear progression and Gathering progression advance together.
Ascension resets the current run, which makes cheap, fast-to-rebuild equipment levels more valuable than expensive single-track investments you cannot recreate quickly.
Atlas of Ascension regions multiply what your gear does — Temple of Precision amplifies your Sword crit pair, Fortress of Steel amplifies Chest, and Wild Frontier funds the whole system faster.
Related guides
⚔️ Combat Guide
Complete guide explaining Blade Rising combat, enemy types, Weak Points, bosses and progression.
Getting Started⚔️ Beginner's Guide to Blade Rising
Learn how combat, Floors of Evil, Gathering, Prestige, Offline Income, Daily Login and the Battle Pass work during your first journey through Blade Rising.
Progression👑 Prestige Guide
Learn how Prestige works in Blade Rising, how Prestige Points are earned, what Ascension resets, and how permanent progression through the Atlas of Ascension makes every run stronger.
Progression⛏️ Gathering Guide
Learn how Gathering works in Blade Rising, including active gathering, passive production, hires, upgrades, resource progression and unlocks.
Progression🎯 Temple of Precision Guide
Master Critical Hits, Weak Points and Precision upgrades in the Temple of Precision region of the Atlas of Ascension.
Progression🛡️ Fortress of Steel Guide
Learn how Fortress of Steel improves defense, armor and damage reduction in Blade Rising.
Related patch notes
Frequently Asked Questions
What is the best equipment to upgrade first in Blade Rising?
How many equipment pieces are there?
How do I unlock Helmet, Chest, Leggings and Boots?
How do equipment tiers work?
Is Reflect worth upgrading?
Should I max one equipment track to level 100?
Continue learning
Next
⚔️ Combat Guide
Complete guide explaining Blade Rising combat, enemy types, Weak Points, bosses and progression.
Read guideNext
⚔️ Beginner's Guide to Blade Rising
Learn how combat, Floors of Evil, Gathering, Prestige, Offline Income, Daily Login and the Battle Pass work during your first journey through Blade Rising.
Read guideReady to climb?
Play Blade Rising
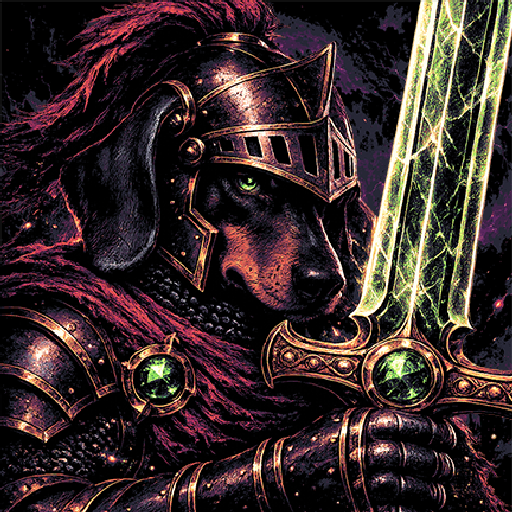
Conquer 1000 Floors of Evil as a Dachshund Knight. Free on Google Play.